The Part List
The Parts panel lists every part in your job. It is where you set how many of each part you need, and where you manage the list as a whole.
What each row shows
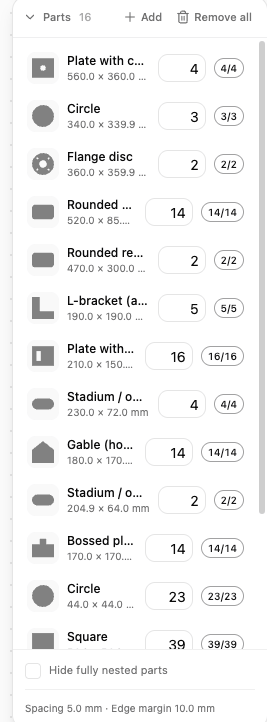
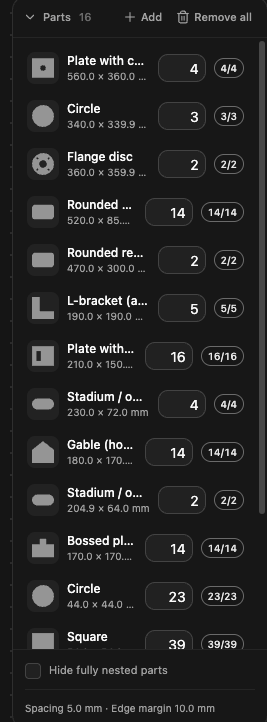
Every part has a row with:
- a thumbnail and the part’s name, with its dimensions beneath,
- a quantity box, where you set how many you need,
- a nested badge showing progress as
placed / required, for example14/14when all are placed, and - a remove button to take the part off the list.
Setting quantities
Type the number you need into a part’s quantity box. This is the target the nester works towards: when you run a nest, NestMaxx keeps placing that part until it reaches the quantity or runs out of sheets. If some copies do not fit, the badge shows how many were placed out of how many you asked for.
Adding and removing parts
- Add

 opens the picker to add more parts, the same as Add parts. See The Shape Library and Importing CAD.
 - The remove button on a row takes that part off the list. If copies of it are already placed on the sheet, they come off the nest with it, and NestMaxx tells you how many before you confirm.
- Remove all clears the whole list and everything nested. Because this cannot be undone, you confirm it by holding the button down for a moment rather than a single click.
Tidying the view
Once a part is fully placed it has served its purpose in the list. Tick Hide fully nested parts to hide those rows and keep your attention on parts that still need placing.
Spacing reminder
At the foot of the panel you will see the current spacing, for example Spacing 5.0 mm · Edge margin 10.0 mm. These are the gaps the nester keeps between parts and around the sheet edge, and it honours them exactly. You can change them in the Quick Nest dialog or in Settings. See Spacing and Clearance.